How the story begins
I’m a member of the Retool Power Users Slack, and I poke my head in a few times a week to see what people talk and ask questions about.
Anil Vaitla (@avaitla16) asked whether or not anyone had been able to implement real-time, event-based query refreshes inside a Retool app. I’ve done it, so I’m here to explain how I got it working.
Before I dive into this, here are a few broad topics you should at least be vaguely familiar with before reading this article:
Explaining exactly how these work isn’t within the scope of this article, but if you have questions about specific implementation details, please feel free to reach out with any questions.
Some popular tools or libraries to look into for real-time event handling are:
Let’s start by mentioning a few use cases for real-time effects.
What are some real-time use cases?
This discussion started with a use case for a Dashboard that’s left open all day, perhaps on a screen at the office, and this screen would refresh live as data changed throughout the day. Real-time events are an excellent tool to build a dashboard like this.
Simultaneous users can be a real pain without a tool like real-time events. I ran into issues with table data staying in sync for multiple users. I use Pusher to force query refreshes to make sure visual data on certain pages stays in sync seamlessly.
For some further reading, PubNub has a cool guide on WebSockets and more use cases.
I will show you how real-time events work in Retool for a raw WebSocket and an external library. Pusher will be my external library of choice because it happens to be the one I currently use.
Hooking up a WebSocket
Hooking up a one-way, listening-only WebSocket is very straightforward in Retool. Hooking up a two-way send-and-receive WebSocket is, unfortunately, quite a bit messier. WebSockets are bi-directional by design, so I feel it is crucial to demonstrate the complete picture.
I will be using a public WebSocket that is excellent for testing from websocket.org. It’s called an echo WebSocket, and by its name, you might guess that it echos back anything you send to it. Here’s an interactive page for it that you can try yourself:
https://www.websocket.org/echo.html
The WebSocket Goal
Before we begin, here’s where we’re trying to end up:
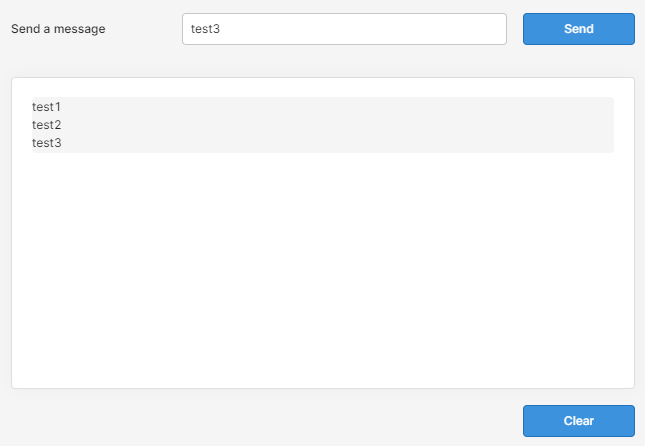
You can type a message in the box and press “Send.” Retool sends the text to the echo WebSocket service. Then, a response handler appends any responses from the echo WebSocket to a responses list. The text reads the response list to build the visual shown above. This textbox will update in real-time and will not require a page refresh to see new messages.
The WebSocket Visuals
Let’s start by going ahead and getting the visual part of the app set up. You will need the following Retool components:
- A Text Input for inputting a message
- A Button for sending the message
- A Container for visual separation
- A Text component for displaying responses
- A second Button to clear the responses text box
Leave the names as the defaults, and arrange them to your preference.
The WebSocket Global Stuff
In the top right corner of your app, you will see a button that has three dots on it:
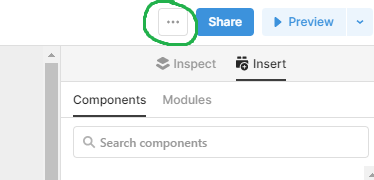
Click on this button, and select “Scripts and styles”. Click on the “Javascript” tab, and add the following code snippet:
const webSocket = new WebSocket("wss://echo.websocket.org")
//Event listeners are the pillars upon which WebSockets are built. This event fires when the WebSocket is considered 'OPEN',//which means that it has connected successfully.webSocket.addEventListener("open", function (event) {    console.log("websocket connected successfully") //log this into the browser console so we can check if the websocket connected})
//This is a global reference to the websocket that we created. We need this because otherwise multiple JS//queries can't access the same WebSocket object. If each query had its own `new WebSocket()`, the interactivity of this//example wouldn't work, because they'd all be referring to different WebSocket connections.
//This is what I was referring to when I mentioned that the two-way WebSocket example was "messier".//This global stuff isn't needed to simply listen on a WebSocket, as we'll see later with the Pusher-based 2nd example app.window.WEB_SOCKET = () => {    return webSocket}
//This is our response message queue. I tried building this initially with a Temporary State object, but//I ran into some weird issues arouund live-updating that I suspect have something to do with React's internal visual cycles.let messages = []
//`window` properties in Retool must be functions to be able to access them as globals from within any query.//For example, when you see a line that looks like://MESSAGES().push(...) it's really referring to our global response messages queuewindow.MESSAGES = () => {    return messages}
//I originally set this up as a simple `clear` parameter for the above function, but the global properties don't support function//arguments. I suspect this is some weird Javascript sandbox behavior, but either way, I can confirm that this works.window.CLEAR_MESSAGES = () => {    messages = []}
In short, we’re creating a global WebSocket and a global messages array that we can access throughout the Retool app. I have added comments to the code snippet to help explain each line of code.
The WebSocket Queries
You will need to create three Javascript queries in Retool:
- websocket - appends messages to our response messages array with an event listener
- send_websocket_message - sends values from the text input to the WebSocket
- clear_messages - clears the response messages array
The websocket query requires special attention. In the settings, under the “Advanced” tab, please check the setting that says “Run this query on page load?”
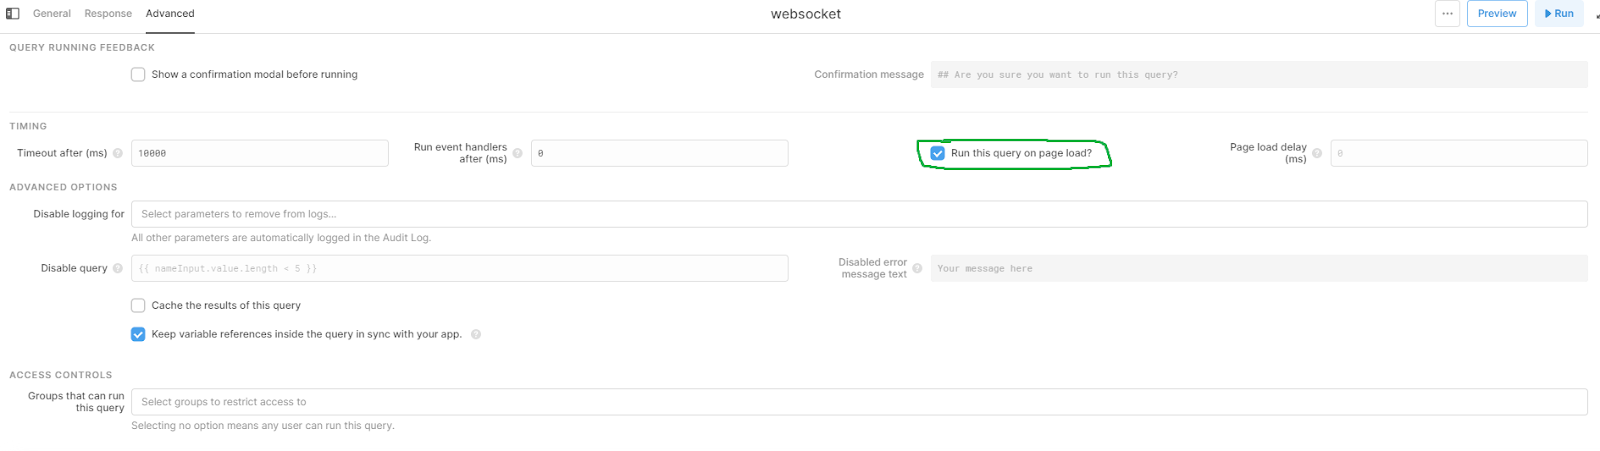
This query running on page load is the primary magic that lets us add real-time listening to Retool apps. As we’ll see with the later Pusher example, this query is all you need to listen to a WebSocket connection.
You can find the code for the scripts and styles section, the three queries above, and a pusher example query at the GitHub Gist here:
https://gist.github.com/sesgoe/81aad6dd4b587d6bcc4d8937407ef601
Once you plug in the code in the appropriate places, you should see something like this:
As far as I can tell, the reason this works is related to how Event Listeners in Javascript work in general. We’re creating a WebSocket object and attaching event listeners to it, so the browser doesn’t garbage collect it, and therefore we get to listen to WebSocket events. Because this runs on page load, Retool sets it up to immediately start listening for WebSocket messages.
That’s the gist of doing it with a raw WebSocket. Now that we’ve created an app using a raw WebSocket let’s briefly talk about why you’d use something like Pusher in the first place.
Why use an external library?
The main difference between doing it manually, and something like Pusher, is that Pusher is a library built on top of WebSockets. WebSocket by itself is a very bare-bones framework.
For example, WebSockets will not handle disconnects or reconnects on their own. WebSockets make no assumptions about the data types you send or receive so that you can send either binary data or strings. Data serialization is another thing left to the developer. These WebSocket design choices allow for maximum developer control but are punishing to get wrong.
Unless you have a specific business or security use case for implementing your own WebSocket handling, I recommend using an external library. External libraries will usually handle a lot of the annoying aspects of WebSockets for you out of the box. Things like handling JSON instead of raw data, reconnecting on disconnects, etc.
Now that you understand the why, let’s talk about building a similar event listener with Pusher.
Pusher it to the limit
Disclaimer for this section: I will not be providing the screenshots to build another Retool app. This section is mostly about adding an external real-time library to a Retool app, and I am assuming that you understand tools like Pusher well enough to set it up for your particular use case.
Typically in Javascript-land, you would npm install or yarn add the Pusher library to use it in your frontend project. We don’t have access to npm install in Retool, so how do we use something like Pusher? Thankfully, most frontend Javascript libraries include a way to use them by simply adding a script tag to your page. If we go and look at the installation guide for Pusher:
https://github.com/pusher/pusher-js#installation
You can see that the standard way is to yarn add pusher-js or npm install pusher-js, but there is also a CDN option to add this script tag to your page:
<script src="https://js.pusher.com/7.0/pusher.min.js"></script>This CDN option is what we need to get it functioning in Retool. It’s essentially the same as including the script tag in the page yourself, which gives you access to the library from inside Retool queries.
To add Pusher, click on that triple-dot button in the top right next to “Share” and select “Scripts and styles” again. This time we want to stay on the “Libraries” tab and add the script source for Pusher like so:
https://js.pusher.com/7.0/pusher.min.js

Once you have added the pusher.min.js file to your “Libraries” tab, you can access Pusher library functions inside your Retool queries. Here’s an example Retool Javascript query that runs a query’s .trigger() every time I receive a Pusher event:
const pusher = new Pusher("app-key-goes-here", {    cluster: "us2",})
//This is where Pusher sets up the WebSocket in the background and subscribes to the Pusher channel called `event-channel-goes-here`//By itself, this doesn't listen to any events on this channel. You need the `channel.bind(...)` line below.const channel = pusher.subscribe("event-channel-goes-here")
//This is the exact same thing as an EventListener. The syntax is even similar by design so that it looks familiar.//Inside the `function(data) { ... }`, you can do any Retool things that you would like to do in response to Pusher events.//In this example, I am triggering a simple query, which will refresh the data inside a table.channel.bind("event-type-goes-here", function (data) {    get_table_data.trigger()})
Note, this can be found at the Github Gist too:
https://gist.github.com/sesgoe/81aad6dd4b587d6bcc4d8937407ef601#file-05_pusher_handler-js
You can find Retool’s documentation on the .trigger() function here:
https://docs.retool.com/docs/scripting-retool#triggering-a-query
Explaining the backend for Pusher is out of scope for this article, but I wanted to provide a quick demo gif to show you what you can expect with Pusher:

A friendly tip
It’s worth keeping in mind that you will probably want to add a real-time status indicator to your apps wherever you decide to use real-time events. Libraries will usually handle disconnects and reconnects for you, but it’s typically helpful to see the current real-time connection status.
Special Thanks
Special thanks to Justin from the Retool Community team for helping me edit and shape this post.